
Caulk vs Sealant: Knowing Which Gap-Filler Belongs Where
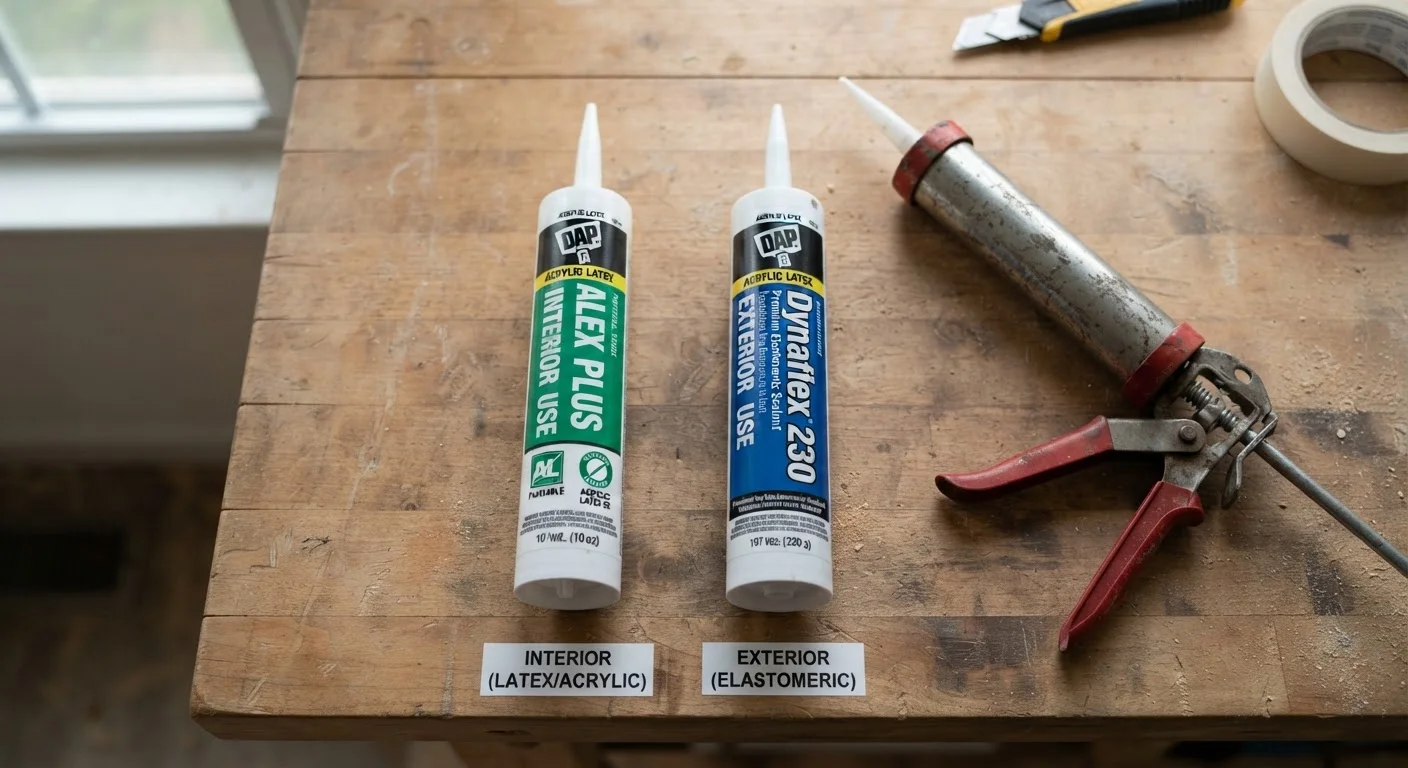
Photo credit: faqsnest.com
In this article
Both fill gaps, but they behave differently under movement, moisture, and heat. Here's how to choose the right one.
Key Takeaways
- Caulk cures rigid and is ideal for static interior gaps where paint coverage matters.
- Sealant remains flexible after curing, making it essential wherever joints expand, contract, or stay wet.
- Using the wrong product in the wrong location leads to cracking, mold, and premature failure.
- Most silicone-based products are sealants; most latex or acrylic products are caulks.
- Always match the product's rated adhesion to the specific surfaces being joined.
What Separates Caulk from Sealant
The terms are often used interchangeably at hardware stores, but they describe products with fundamentally different properties once cured. Caulk — typically acrylic or latex-based — dries to a relatively firm finish. It bonds well to common interior substrates like drywall, wood, and plaster, sands lightly, and accepts paint, making it the natural choice for finish carpentry and interior trim work.
Sealant is the broader category that includes silicone, polyurethane, and hybrid formulas engineered to remain flexible after cure. That elasticity is what allows a sealant to stretch and compress with joint movement — whether that's a tub deflecting under load, an exterior frame cycling through summer heat and winter cold, or a concrete expansion joint shifting over time.
A useful shorthand: if the joint will move, get wet, or face temperature extremes, reach for a sealant. If it's a static interior gap you plan to paint over, standard paintable caulk is the cleaner, more economical choice.
| Criterion | Caulk | Sealant |
|---|---|---|
| Typical base material | Acrylic or latex | Silicone, polyurethane, or hybrid |
| Flexibility after cure | Rigid to semi-rigid | Highly flexible / elastic |
| Paintable | Yes — accepts latex paint | Generally no (pure silicone) |
| Moisture resistance | Low to moderate | High — suited to wet areas |
| Cleanup | Water (before cure) | Solvent (silicone); water (hybrid) |
| Best location | Dry interior joints | Wet areas, exterior, or moving joints |
| Adhesion to porous substrates | Good | Variable — may need primer |
| Lifespan in correct application | 5–10 years | 10–20+ years |
Where Each Product Belongs — and Why It Matters
Placing the wrong product in the wrong location is one of the most common reasons gap-fills fail within a year. Rigid caulk applied around a bathtub will crack as the tub flexes under water weight — a problem explained in detail in why bath silicone keeps failing. Conversely, using silicone sealant at an interior baseboard joint creates a glossy, unpaintable bead that looks out of place and is difficult to rework cleanly.
Correct applications for caulk
- Interior window and door casings where movement is negligible
- Gaps between baseboard molding and drywall or flooring
- Crown molding joints at walls and ceilings
- Small interior wall penetrations (pipe escutcheons, cable pass-throughs) in dry areas
Correct applications for sealant
- Bathtub and shower perimeters — always use a mold-resistant silicone or hybrid here
- Exterior window and door frames
- Where dissimilar materials meet (e.g., brick-to-wood, tile-to-metal)
- Expansion joints in tile floors or countertops, where grout would crack under seasonal movement — a scenario covered in our guide to common tiling pitfalls
A critical note on surfaces: silicone sealant bonds poorly to many porous materials unless a primer is used. Always check the product's listed substrate compatibility before applying.
Composition, Cleanup, and Practical Handling
Knowing how each product behaves during application saves time and avoids wasted material.
~25%
Home heat lost through gaps and cracks
The U.S. Department of Energy estimates roughly a quarter of home heating and cooling energy is lost through air leaks, including improperly sealed gaps around windows, doors, and penetrations.
½ inch
Maximum gap width before backer rod is needed
Industry guidance from sealant manufacturers consistently recommends foam backer rod for gaps wider than ½ inch to ensure proper joint geometry and product performance.
2:1
Ideal width-to-depth ratio for sealant joints
Most sealant manufacturers specify a joint width-to-depth ratio of approximately 2:1 for optimal flex performance and adhesion — wider than it is deep.
Working with caulk
Latex and acrylic caulks are water-cleanup products — a damp cloth or finger removes excess before cure with minimal fuss. They typically skin over in 30–60 minutes and fully cure within 24 hours, though that window varies by brand and ambient humidity. They're easy to tool with a wetted finger or a caulk-finishing tool, and they shrink slightly during cure, which can require a second pass on wider gaps.
Working with sealant
Silicone sealants require solvent (typically mineral spirits or isopropyl alcohol) for cleanup before cure. Once cured, silicone is extremely resistant to removal — proper surface prep and painter's tape masking before application is strongly recommended to keep lines clean. Hybrid sealants (often marketed as "siliconized" acrylic) offer a middle ground: water cleanup, some paintability, and greater flexibility than standard latex caulk, though less flex than pure silicone.
For both product types, surface preparation is non-negotiable. Joints must be clean, dry, and free of old sealant, grease, and dust. Adhesion failure almost always begins at the substrate, not the product itself.
Sizing the Bead and Knowing When to Call a Professional
For gaps up to about ¼ inch (6 mm), a standard caulk or sealant bead is appropriate and manageable for a DIYer. Gaps wider than ½ inch typically need a backer rod — a foam cylinder pressed into the gap to reduce its depth before the sealant is applied on top. Without a backer rod, deep joints use excessive product and are prone to sagging, adhesion failure, and prolonged cure times.
Most interior caulking and sealing tasks are well within the reach of motivated homeowners. However, consider engaging a licensed professional for situations involving:
- Exterior envelope sealing on multi-story buildings where ladder safety is a concern
- Structural expansion joints in masonry, concrete foundations, or load-bearing assemblies
- Any gap-filling that overlaps with waterproofing requirements addressed by local building codes
Always verify whether the project requires a permit or inspection under your local jurisdiction's rules before sealing anything that conceals pipe, wiring, or structural elements. This is especially relevant when sealing around utility penetrations in exterior walls, where air-sealing intersects with energy code compliance in many US states.
When in doubt about which product, gap depth, or method to use, the manufacturer's technical data sheet — typically available on the product's website — is the most reliable reference before you start.

Author
Home & Garden Editorial Team
Home & Garden Editorial Team is the collective byline for our editorial team and contributor network. Articles published under this byline or an editorial pen name are researched, written, and reviewed according to our editorial standards for clarity, consistency, and independence before publication.
View all articles →